Although last terms project was successful, theres some ways in which I can improve it. I plan to add a video to the news broadcast to change it from just sound to sound and visuals.
I will record some new footage which introduces the broadcast with a reporter, but will overlay related visuals to most of the stories being told, so that I can still use the radio broadcasts audio. For the found footage I'm going to use I will record a wild track.
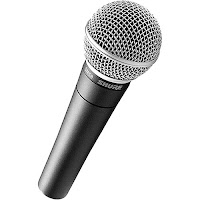
The equipment I plan to use is a green screen and a directional microphone when recording the news broadcast. Here is an example of what I'm aiming to make:
Because I'm using an external microphone I'll have to sync up the audio track with the video, so I'll clap to mark a point where to sync both tracks. An example of where I did this is the New Years Resolutions video I made last week:
Bath College News Rework
Audio Rework Evaluation
For this project we had to rework our audio project we had made in last terms lessons. Before I had made a radio broadcast, so this time I decided to make it into a news broadcast with visuals. I first planned to have a news format with my reporter in front of a greenscreen, but in the end I decided to just have my reporter in front of the college for a more casual feel (as the news service is called Bath College News). I recorded an introduction and sign off by the reporter for my broadcast on a DSLR using an external mic. The microphone I chose to use was an h4n zoom mic with an external directional mic attached. This picked up the reporters voice clearly and excluded all other noises. After this I added some images sourced from google onto the report which related to the stories being reported, to give it a more professional and news like feel.
Overall I think this task went fairly well and my piece of work improved from last term. One thing I think which went well was the introduction of the news broadcast with the reporter, as it looked proffesional and brings attention to the viewers. One thing which I would like to have done would be to add videos as well as images to the broadcast in order to make it more interesting. I enjoyed the editing the most in this project, and most importantly had fun and learnt new things.
For this project, I didn't need to record any wild tracks separately to add in to my project, as the report would just contain the reporters speech and idents created digitally.
I didn't need much administration for this project. All I had to record was 3 different news stories and an introduction and outro. I planned this by writing a script that could be read off.
When I composited the report in Premiere to take out the parts I didn't need and add idents, I made sure that the audio levels were suitable throughout by checking the Master Audio Levels. I adjusted the sound of all my clips so that they were around -6dB at all times, so no clipping occured.
Here's a screenshot of my timeline:
I also made album art for this news report so that at first glance the listener knows what the thing they've downloaded is. It also makes the report more professional.
Evaluation
Overall I think that this project went fairly well and was quite easy. The end product ended up sounding professional and is an effective broadcast which communicates short news pieces well with the listener. One thing which I could've improved on is equipment. I used a zoom h4n microphone to record the broadcast but I could've used an additional external mic connected to the Zoom for clearer speech recording. This would've been the most fitting setup for a news report.
Something which worked well was the script which made the report sound realistic and professional. This is because in my research I found examples of news reports and took note of how the reporters welcome in the audience and the language they use.
Another thing which I could've improved is the ident, as it is very simple. I could've made it longer or added drums or something similar, similar to the idents I found when researching for this project. I made it using Logic Pro X (screenshot below).
As you can see from this screenshot, the ident is only made from a simple melody and two chords. If I do this again I could try and use more complex chords or additional instruments.
In conclusion, I found this project fairly easy, however I should have spent more time planning the technical side so that I could have used the most effective equipment and more time making the ident.
For this media product, I will be making a factual radio broadcast (non-fiction) which quickly reports on a few news stories. There will be one reporter who communicates with the audience. It will begin and end with a musical ident made with Logic Pro X and will be recorded using a Zoom H4N microphone. The musical ident will help listeners identify that this piece of audio is a news broadcast. I will composite the broadcast together in Adobe Premiere and upload it to soundcloud.
Script
This is Bath College news with Aiden May.
An ancient city has been unearthed by archeologists in Egypt. It lies by the River Nile, and experts say that the city dates back more than 5,000 years and contains houses, tools, pottery and huge graves.
It is believed that this location was home to important officials and tomb builders who may have been involved in the construction of royal graves in the nearby sacred city of Abydos.
St Gregory's school in Bath was forced to cancel all of its after school clubs on Wednesday October 12th after the a threat was made on social media. Police were forced to step up patrols at the school, as the threat received was from a 'killer clown'. The killer clown craze began in the United States, but sightings of clowns holding fake weapons and airguns have been reported in the UK - most recently in Keynsham near Bath.
Headteacher Ann Cusack issued a letter to all parents stating that they took the report seriously and followed council safeguarding guidelines. The email sent stated that 'all students would be sent straight home after school and all after school clubs and fixtures were cancelled.'
Police have warned clown pranksters they are risking a criminal record.
Lastly, three young suspected joyriders from Bath have been charged with vehicle crime offences after a stolen Porsche was found in a hedge in West Harptree. Police were alerted at 3.15am on Friday the 18th November that a Porsche 911 had collided with a hedge in Harptree Hill, 15 miles from Bath. The three suspects were later arrested at 5.45am on the A368 in Bishop Sutton.
This has been Bath College news with Aiden May, thank you for listening.
When creating my report, I plan to use snippets of audio and maybe some background music, as well as a musical ident. These things will need to be sourced, which raises the issue of copyright. The three most common types of copyright are:
Creative Commons - This is a license where a copyrighted work is enabled to be used/distributed for free. Its used when an author wants to give people the right to share, use, and build upon a work that they have created.
Royalty Free - Can use the material/intellectual property without paying royalties or license fees
Fair Use - Where content is used to criticise or comment on
For my project, I'm going to source my material from various places online, dependent on what it is. Because it's a factual news report, I'll use some audio snippets related to the news that will be reported on, which I should be able to find on YouTube. These snippets will be fair use as they're only short extracts being commented on.
I aim to make the ident using a DAW on the college computers such as Logic Pro X or Ableton Live, which means that the content will be made by me and not at risk of copyright issues.
In our audio production brief, we're asked to pick one task to further develop in audio lessons out of these three:
A single camera comedy drama for Instagram, edited in Premiere
A pre-recorded 90 second news report for radio, including a musical ident
A 120 second factual film informing an identified audience about a cause or campaign
After reading these, I decided to do the second task. To research the sound aspects of this task I first looked for some examples similar to it. I found this one minute news broadcast which was helpful in me understanding the format of a news report.
The first 3 seconds open the broadcast with a musical ident, which sets the tone of the show. Then the reporter greets the listener (or watcher in this case) and makes the audience aware of the show/what they're listening to. Then the reporter reads the headlines and says a little about them, each headline and description lasting around 10 seconds. With this report, the speech is accompanied by visuals and audio to help emphasise the stories and give context however this format would still work without visuals for a short radio broadcast so I'll keep these things in mind when I go on to record and produce my own short news report.
I also found some textual information to help with my research, these two websites:
The first website gave some tips as to what to do and not do when making your own radio broadcast. Some helpful points for me to consider were to:
Be Concise
This is so that the listener doesn't lose interest, which should be relatively easy as I only have to make a 90 second report. Because of this I'm going to aim to report on 4 or 5 stories.
Record your voice in interesting places or make use of sound effects
Background noise can make a radio broadcast more interesting, however I think that recording in an interesting place could cause problems such as unexpected sound, microphone issues or inaudible speech. To make sure my broadcast isn't silent at points I will have audio in the background which relates to the story being reported or is sampled from the story if possible.
Have an effective closure
By closing off the broadcast well, the listener leaves with something to think about, reminding them of the podcast. I'll try to do this for my report.
The second website was more detailed and it said that it's important to thoroughly plan the broadcast before recording (or as the article puts it "Preparation is 90% of the game"). It also said to speak in an entertaining manner, which will make the audience more likely to appreciate the broadcast and listen to the whole thing. This also means trying to avoid saying 'um' 'uh-huh' and similar words.
Lastly, I found this video which contained examples of a range of idents. It will be helpful when I come to make my own as the video shows a simple version of an ident and how it develops, as well as talks about adaptations of idents and how they can connote certain moods and tones.
Throughout my first six weeks on this course, I have learnt a lot and started to develop many new skills in a range of areas.
Firstly, in Moving Image and Media Theory I have developed my knowledge about film and the history of film. I've discovered how films have changed over time and how different shots connote different moods and feelings to an audience. I've found out how sound helps to tell a story and make it more effective, and the process of how it's done in the real world, which I didn't know before. Through this I learnt about foley artists and how to use a sound recorder to get my own sounds for my films, and how to edit them accordingly. I've also learnt how to effectively use Premiere Pro (which I had some knowledge of before) so that it backs up my project as I work, and lays out my footage in an organised and effective manner.
In my Audio lessons with Tom Grey I have learnt about audio and sound in more detail. He helped us further understand about sound in film, and how to use Premiere with sound design and music, so that the sound is mastered and doesn't clip. He also taught us about making photomations, and how to edit them in Premiere by importing photographs in a group called an Image Sequence.
Publishing with Ty has helped me learn how to be more efficient with photoshop, as well as develop my knowledge about graphic design and film posters. I already had basic knowledge of photoshop before these lessons, however he let us experiment with the program and discover new things individually. He also taught us a range of keyboard shortcuts and techniques to make us more efficient with the program. In these lessons I've produced some of my own film posters that I'm proud of, and gained some useful knowledge and skills which will be helpful later in the year.
Film Poster Mashup made
in publishing (Design 1)
Film Poster Mashup made in publishing (Design 2)
Sprited Away Poster (Made in Publishing)
Final Design of Spirited Away poster
Lastly, Interactive lessons with Steve Spicer have been really useful in helping me develop my knowledge in design and how I look at pieces of work me or others have made. In these lessons I've learnt a lot about very important parts of Media such as colour, text and design. Steve taught us about colour theory and colour harmony, typography and connotations of typefaces which are very useful to know about, and have helped me in other lessons when designing things. I also learnt the basics of Adobe Illustrator which is a complicated program, made simple to understand in these lessons. Using it I have made infographics as well as gained knowledge on how to use it for making posters and 3d graphics.
Colour Wheel made in Interactive
Image made in Interactive showing different parts of a typeface
Overall I think that in this first six weeks I have learnt a lot about programs and theory which will be very helpful as this course goes on, and now I feel a lot more confident approaching tasks with this knowledge. I still have things to improve on however, one is being more effective at planning and putting more time into planning before getting into a task. Another improvement I could make to help my learning is to spend time doing independent research and work (i.e. outside of college) and giving evidence of this. In the next term and half term holiday I will definitely try to act on these improvements, be it watching a few films mindfully, reading a book or getting outside with my camera and experimenting with it.
This blog shows all examples of all of the skills I have listed, as well as the video below, which shows some examples of skills I have developed:
In audio, we had the task of making our own photomation. A photomation is a sequence of images, which when played in succession look like moving video. In the first week we experimented with photomation and made our own short videos using the technique. I found it was quite easy to do but very time consuming as it involved taking a picture, moving the subject a fraction, then taking another picture and so on. The editing was also fairly straight forward, as we were taught how to import our photos as an image sequence into Premiere. This way the program could handle the footage a lot better and the photos were all grouped into one video clip. Here is the video I made experimenting with Premiere and Photomation:
Because it was like skateboarding, I added some effects on Premiere to make it look like it was filmed witha a fisheye lens. This made the video look more fitting.
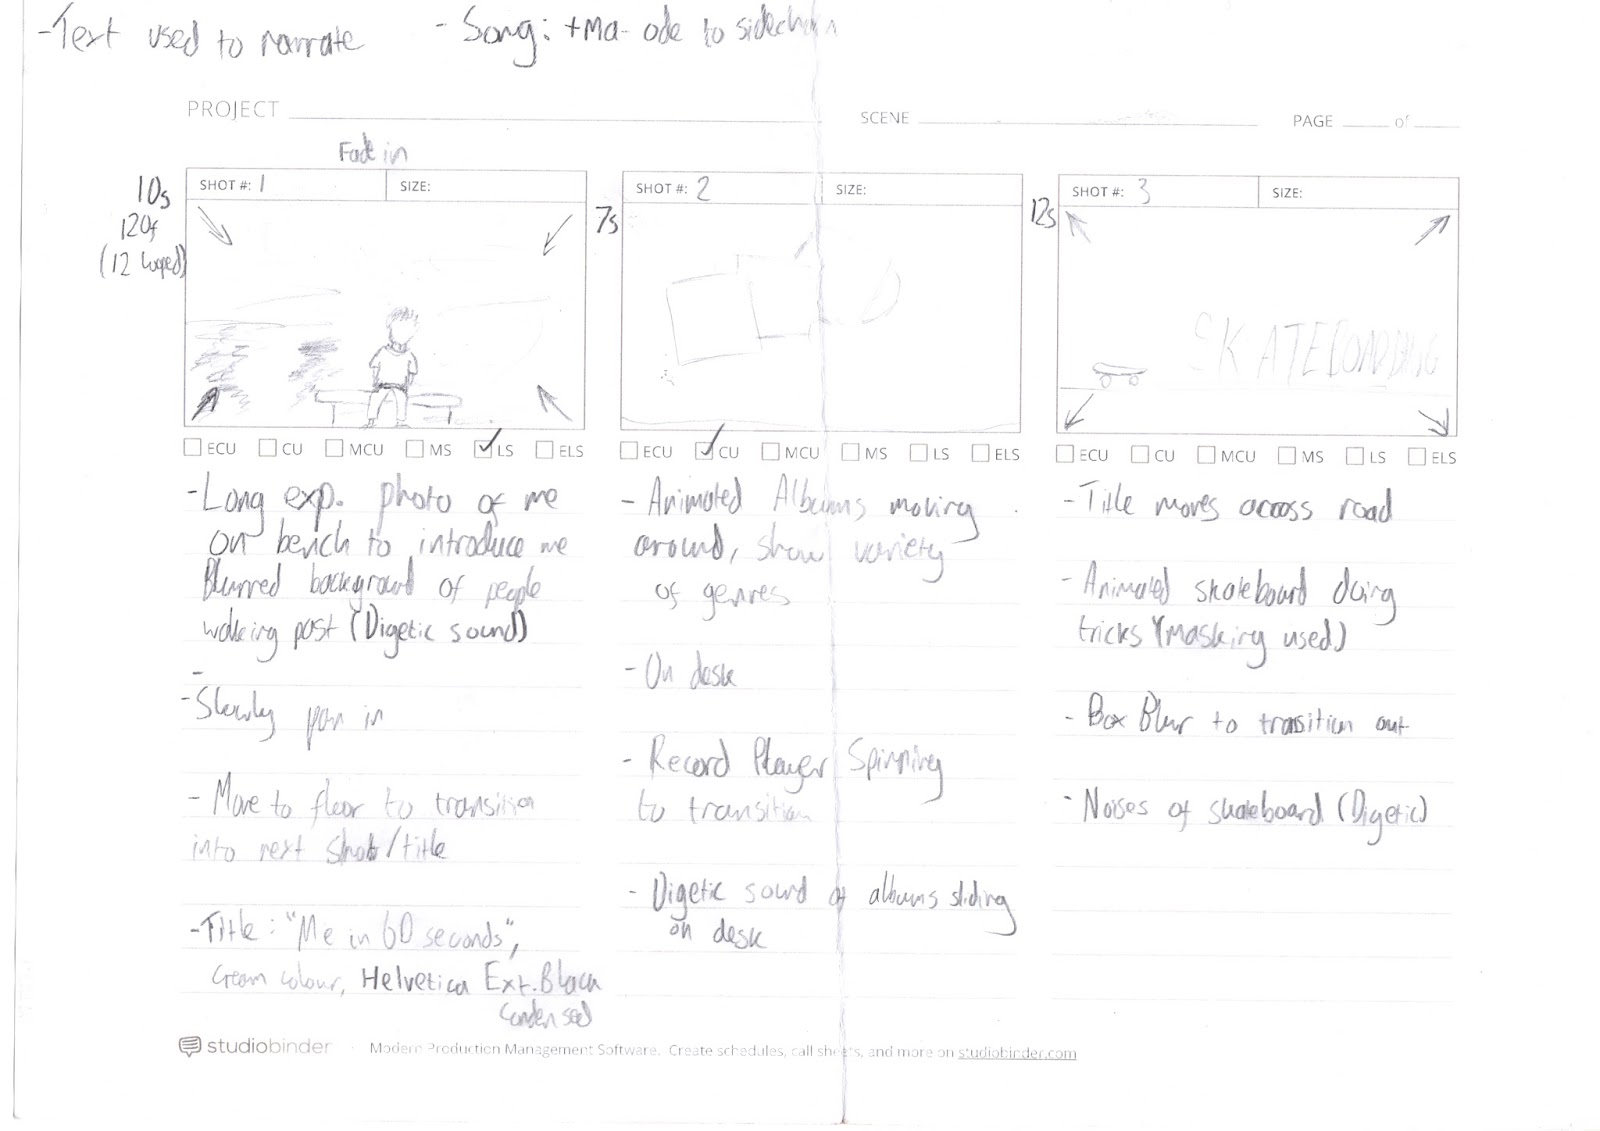
After this it was time to start planning our full photomations. I firstly started a document and listed some features that I wanted my video to have. These were:
-around 60 seconds in length
- add titles and colours grading when editing
-include skateboarding, certain music I like & photos I've taken
I also did a blog post researching how I want to present my video, and what size/ratio it will be. I decided to make it square so it can be posted both online on platforms like Vimeo and YouTube, and on mobile on Instagram.
After this I drew up a storyboard:
When it came to the final edit, some of the shots I storyboarded didn't make it as when making my photomation I experimented and tried to make an effective video with the things I had available to me. During shooting, I used a tripod to get some interesting birds eye view angles. I also used a tripod for other shots to make sure that the photomation wasn't shaky. I used a bridge camera with manual settings to ensure that the lighting stayed as consistent as possible in shots. If I was to do this again I would've used a DSLR for better looking images, with a high aperture. After I had taken all of the photos it was time to edit them together.
Firstly I arranged the different shots into folders so I could import them into Premiere as individual image sequences. At this stage I also deleted any bad photos and did some masking using Photoshop. This was for a shot where I made my skateboard appear to do tricks and essentially 'float'.
To do this I imported a photo of the skateboard on top of a jar so it was raised and then on another layer imported a background with no skateboard on. I then used the eraser tool to remove the jars. Lastly, I adjusted the Brightness/Contrast of the background layer so everything blended in. I did this for about 10 frames.
I Then composited the whole project in Premeiere Pro, arranging the clips alongside the music and adjusting the speed of some clips. I added titles to help narrate the video, as noted in my plan and storyboard using the Titles feature in Premiere Pro. The text looked boring at first and I wanted to give it some creative flair to make it look more interesting. Therefore I added a stroke and drop shadow to it, and changed the text colour from white to a range of pastel colours. I also changed the font. As the film is meant to represent me, I made the text look appealing to me.
In Adobe Premiere I also touched up each shot by adding an adjustment layer to each one.
In this adjustment layer I added the effect 'Three Way Colour Corrector'. This allowed me to adjust the hues of the shadows, midtones and highlights. It also can adjust the input and output levels and saturation.
After this, I had a section in the video where it says I take photos, and here I wanted to insert some photographs I've taken. I did this, but they didn't fit with the flow of the video as they were still and made it look a bit boring. Therefore I used photoshop to split them up between the foreground and background. I did this by cutting out the foreground subjects with the lasso tools and bringing them to sepereate layers. After this the original image had gaps in so I used content aware fill to fill in the gaps. Lastly, I touched up the gaps with the spot healing brush tool and clone tool. The background still looked a bit scruffy for a couple of images so I applied a gaussian blur to soften it.
Once I was done, I ended up with a layer for each subject in the foreground, and a background image. I did this for three photographs then moved onto Adobe After Effects.
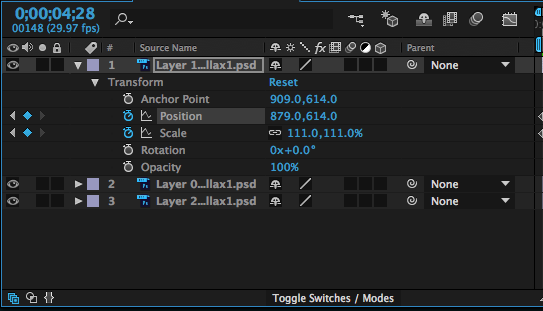
In After Effects, I dragged in my seperated photographs (saved as .psd's) and put them into a new composition. I then used keyframes to change the scale of the background layer, and scale/position of the subject layers. This gave a 3D photo effect which made it look like the photograph was moving and I found it really effective and proffessional looking. I rendered the After Effects composition into a 5 second video for each photograph.
Keyframing my 'Photo Parallax' in After Effects
After I had done this, I moved back to Premiere and put in the photo clips I had made. The video was finally complete, however I still had to give it sound. I used a website called 'freesound.org' to search for copyright free sound effects I needed for my project. I downloaded them and added them to my timeline to sync them up with the video. This was fairly easy, however I had to adjust the volume of each sound so that it didn't clip and everything stayed under the -6dB mark in the audio levels in Premiere. This is a photo of my complete timeline:
Lastly, I rendered my video. It was a bit confusing, but as I was familiar with this process I managed to pick the right settings so that my video exported correctly in the best quality. I picked the H.264 format and made sure that the frame size was the same as my project (1280x1280).
If I were to do this again, I would have spent more time planning in order to achieve some more interesting shots with some variety. I'd also use a better camera with some shots that look stylish (e.g. using a shallow depth of field/long exposures). Maybe I would try to shoot at some different, cool looking locations too. The audio worked well I thought, however I could narrate with my own voice which is also something else to consider if I were to do this again.
The video fits well in the YouTube player and would also work well on Instagram if I decided to post it on there.