
I wanted my magazine and advert to pastiche retro 80's/90's style and design, so I made a moodboard in pre-production to try and show the 'look' I was going for. I aimed to make sure I kept to this style throughout production.
Magazine Development
Front Cover

To start off with my magazine production I referred to the flatplan I made during pre-production and began to create the magazine page by page in Photoshop. For each single page I opened a new document in Photoshop and selected the preset 'International Paper > A5'. For double page spreads I made a document like this but doubled the width.
I started with the front page, which I planned to include the title and a photograph. I came up with many different names, and whittled them down to three: 'Creators', 'Carpe Noctem' and 'Youth'. I decided on 'Carpe Noctem' meaning 'seize the night' because I liked the twist on Carpe Diem and thought that it was unique.
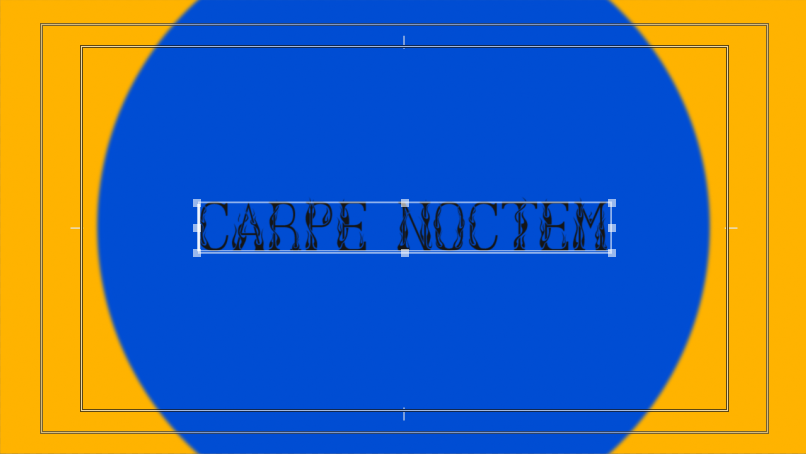
After coming up with this name I set out with the front page. At first I wanted it to just be a solid colour with a title:
After coming up with this name I set out with the front page. At first I wanted it to just be a solid colour with a title:

I tried this with a few different colours and fonts, but thought this looked a bit boring and bland, because there was a lot of dead space. I therefore decided to replace the solid colour with a photograph. I used some photographs I shot on film on a sunny day which had nice colours and retro undertones thanks to the film photography. Through my experimentation with 35mm film I was able to develop my design for this front page and choose fitting images.

I liked the flame font from before as I thought it gave off a real 90's aesthetic, so I stuck with it. After trying a few different photographs I stuck with this one:

I chose this one because the white text looked good against the blue sky and effectively stood out. The photograph makes for an appealing front cover due to the yellow flowers complimenting the deep green tones from the leaves and the light blue sky. The light clouds also match the title colour. My view of the colours was helped by my research on colour theory.
Title Pages
After my primary and secondary research I drew some conclusions as to what I should include my magazine and how it should be laid out. One thing I discovered from my research was the effectiveness of splitting the magazine into sections, giving each different section a title page, similar to iD magazine. I wanted to go for a font similar to the one used on the front page, and also wanted it to be simple. In the end I decided with a black, flame style font on a white background. I liked the font because it looked hand drawn and as if it had something more than just a title. It made it look more interesting. Here are a few examples of the final title pages I made:

One problem I ran into when creating these pages was making sure that the letters all lined up seamlessly so it looked neat and hand drawn. I did this by adjusting the tracking in the character window of photoshop as shown.


Interview Pages
Most of the content in my magazine is interview based. It has four interviews in total and they all follow a similar design pattern as I wanted to magazine to be neat and uniform. I went about doing these interviews by getting in contact with the people and asking if they were willing to be interviewed, then I came up with a list of questions and asked them.

As far as design goes for the interviews I used rulers in photoshop to split the page into two, then from this created columns for the text to go in. This made it look neat and uniform. For the type in the interviews I decided to use the same retro looking font throughout to fit in with my theme.


To differentiate the questions from the answers, I made the text of the questions bold. After typing up the interview, I was able to make spaces for images because of the text being bound to a box. I was able to press enter making breaks in the type to make room.
When adding the images to the interview, I made sure they all had around the same colour scheme and that they were related to the interview so that it looked uniform, visually appealing and nothing clashed. As an example I'm using the double page spread interviewing Aiden May. I shot the photographs of Aiden on film in London with him, and took photos showcasing him and his clothing pieces, because the interview focuses on fashion and Aidens involvement in it. I also made sure that when choosing the photos I used the ones with prominent greens, browns and skintones.

From the whole roll of film I chose to use the portrait of him outside the shop as I thought this image was stylish and introduced the subject well. I also chose the photograph of his shoes as these are the pair he mentions just above the image on the page. Lastly I used the photograph of him walking in the tunnel as it had the same colours as the other two photos and fitted nicely over half of the page. It also shows Aiden with shopping bags which I thought was fitting.

Magazine Layout
When compiling the rest of my magazine, I went through some changes to the layout and design to make it fit in with the overall style. One of these things was the layout for Reubens interview.
I thought that it looked a bit bland, so I changed the colour of the title to match his t-shirt colour in the portrait, and added a border of the same colour to the image using the rectangle tool. The border idea was inspired by my research when looking at 'Dazed' magazine, as they used a similar design technique. Below are before and after images of the changes I made to improve the layout:


Another layout change I made was on a double page spread of my photography near the end of the magazine. At first I had one photograph taking up the whole page and another on a white background.

I decided to reduce the size of the full page photo and add a border to both images, which made them match more and look better side by side:

However I still thought this looked a bit bland, so I decided to add a background because I felt this gave the photos context and set a scene. The vivid colours and high saturation of the background made sure that this fitted in with the style.

Final Magazine
After typing everything up and laying out all of the photos and images I had created a full magazine.

I named each page with a number to order them, as before the files were all jumbled and unorganised. By numbering each page it prepared them to be printed into a physical magazine. I also made a .pdf with all of the pages in one file as a digital version and hard copy which I could make amendments to.
Advert Development
When starting the production of my advert I had a fairly clear idea of what I needed to do due to me storyboarding and creating a shot list in advance. I only had 8 things to shoot on camera as the rest of the advertisement would be graphics in the form of titles or animations.
I started off by putting together all of the digital parts of the advertisement according to the storyboard in Premiere Pro. In the storyboard I had planned out all of the colours, titles and transitions I wanted to use in the video. I decided to use the same font from the magazine title in the title of the advert to give the name its identity.
The first shot is animated and has circles which reveal the title. I did this by using keyframes, although it looked fairly artificial at this point.

To solve this, I added some directional blur to the circles to create motion blur, to make the movements look smoother. I also added a small amount of gaussian blur to soften the circles.


The beginning scene ended up looking like this:

Another big part of the advert was the timing to music. I wanted it to flow well and keep the viewers attention and therefore wanted all of the editing to be in time with the song I used. To make sure of this, I zoomed into the audio track in order to see the waveform. This way I could make the cuts and see where they relate to the song.

To shoot the actual video parts of my advert, I set up a greenscreen for the shot of the magazine spinning around. I originally set it up in my room however it was fairly dark and the lights gave off an orange tone. I therefore did it in my sisters room in the daytime as it has large windows which let in lots of natural light. To give the illusion of the magazine floating, I attached a piece of green string to the inside of it so I could hold it up. Below are the pictures of the setup.


I also shot some footage of the magazine being held and read in front of the greenscreen for the advertisement.
At the end of the advert I added a link to the shop online where the viewer would be able to buy the magazine. I thought this was okay but I decided to add a qr code that once scanned takes the viewer straight to the website. This not only adds ease of access but also makes the advert more up to date (which is comedic due to its very not up to date style).
Here are before and after screenshots of the end frame:


This is the first render of the advertisement:
At this point I thought it looked good however I wanted it to have more of a retro style. To solve this I opened it in after effects and applied lots of effects to the video to try and superimpose a vhs style to the video. This included blurring the channels, adding some frame jitter, distortion and a noise and static overlay. After adding these effects the advertisement looked really stylised and I thought it fitted the aesthetics and style well. This is the final render:
Website Development
Finally, I put together a fake website to sell the magazine. I used the company 'bigcartel' for this online shop as they set it up and make it user friendly to create a shop. I stayed with the generic template and adjusted the colour scheme to follow that of the magazine in the sidebar.
 I also used photoshop to create a header image, using the magazine title font to keep continuity within the brand. I made sure it had the same colour background as the background colour of the website so that it blended in.
 After this I shot some photographs of the magazine to use on the website. I did this in the studio against a large white piece of card to give them a clean, professional looking background. When shooting the photos I shot in RAW format so I could edit the photos non destructively. These are some of the photos I shot:


 I used one of the images to show the magazine as a product and the rest of them on the website in a gallery on the homepage.
 I thought this looked good however the borders made the photos look dark and unprofessional. To solve this I used photoshop to cut the backgrounds out of the image which made it look a lot more professional and made the design look a lot neater.
 After this I thought that the site looked complete and authentic. Here is a link to it.
Website Development
Finally, I put together a fake website to sell the magazine. I used the company 'bigcartel' for this online shop as they set it up and make it user friendly to create a shop. I stayed with the generic template and adjusted the colour scheme to follow that of the magazine in the sidebar.

I also used photoshop to create a header image, using the magazine title font to keep continuity within the brand. I made sure it had the same colour background as the background colour of the website so that it blended in.


I used one of the images to show the magazine as a product and the rest of them on the website in a gallery on the homepage.

I thought this looked good however the borders made the photos look dark and unprofessional. To solve this I used photoshop to cut the backgrounds out of the image which made it look a lot more professional and made the design look a lot neater.

After this I thought that the site looked complete and authentic. Here is a link to it.
No comments:
Post a Comment